The Kitchen Box Project
Napoleon and Off Roading
Napoleon knew a thing or two. One of those things – “An army marches on it’s stomach” – is true for the off road adventurer too. Now in the past, my culinary preparations before an “expedition” would have been fairly straight forward: A bag of “mielie meal” (corn meal for the non-Africans) – the quantity dictated by the expected duration of said expedition, a small packet of salt, some tea bags and a little powdered milk.
The relish to accompany the “sadza” (cooked corn meal) would be whatever happened along, very convenient and made a cooler box unnecessary. Then if I was feeling very “larny” (sophisticated), and up to lugging it around, there would be a can of peaches or condensed milk lurking in the bottom of the rucksack somewhere. As far as cooking utensils were concerned, there was little need for more than one small pot and a knife. The “bottle pot”, in which my trusty one liter water bottle nestled, served well enough to heat water for tea and doubled as the tea cup too.
Everything changes, however, when it’s not just lil’ ol’ me and there are others along for the adventure. So how does one ensure that the troops are fed and fed well when we venture off road? This post is about the “tools” and I will deal with the actual food in another post. So here’s a fairly simple project from a couple years ago, the “Kitchen box project”.
The concept
It is not a new concept and there are many designs out there. The basic idea is to have all your cooking utensils, crockery, cutlery and stove in one box. The level of sophistication will depend on your needs and what you consider essential equipment. Some will insist on everything including the proverbial, or even literal kitchen sink. However it can be quite a surprise to discover how little one actually needs.
Planning
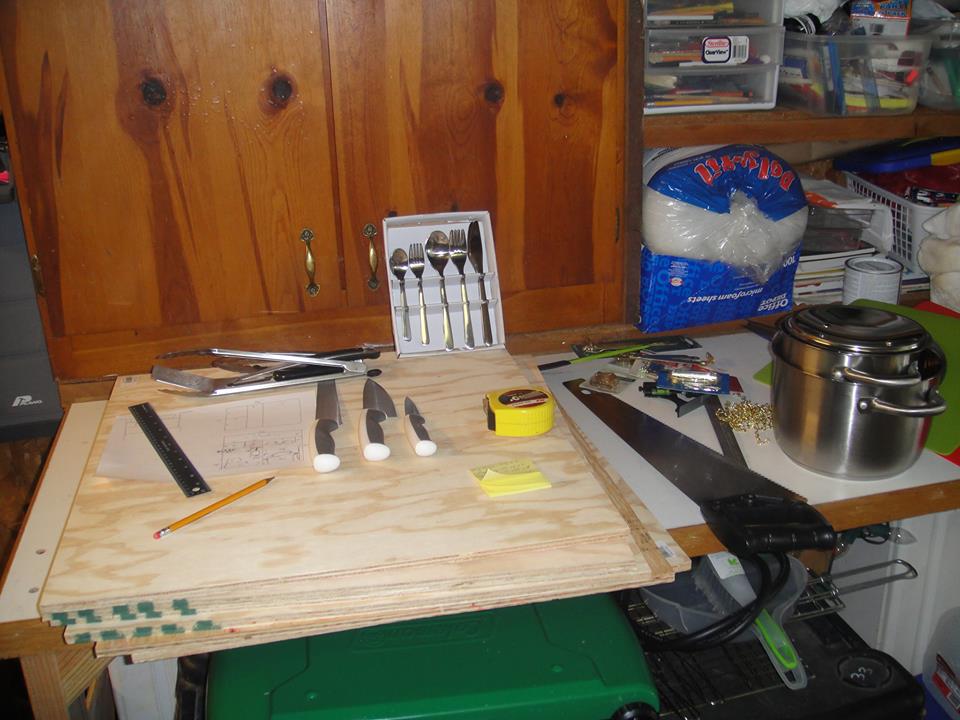
So how did I do it? The first step was to assemble the “tools” we wanted in the tool box. I say “we” because I relied heavily on the expert advice of my dear wife. Her culinary skills are truly amazing and her requirements much more sophisticated so, thankfully, one bent fork and a jam tin for a tea cup was a non-starter . . . Then it was a little like building a puzzle, scribbling various designs to arrive at the best configuration. How to make the best use of space in the most convenient layout to use. The one feature that is pretty standard across all designs is the stove placement – on the top. One of those times when it’s a good idea to work your way down from the top . . .
Now a disclaimer, this project was an experiment as I was fairly certain I would not get it right on the first go. So the idea was to produce a working prototype. Something that can provide real life experience and feedback to guide my quest for the ultimate camp kitchen box. As a result, it is rather rough around the edges. I also used a mix of construction methods to see what worked best and also looked good. So if you are expecting to see a smooth, polished product, you will be disappointed.
What’s in it?
Let me start with an inventory of what I have in the box:
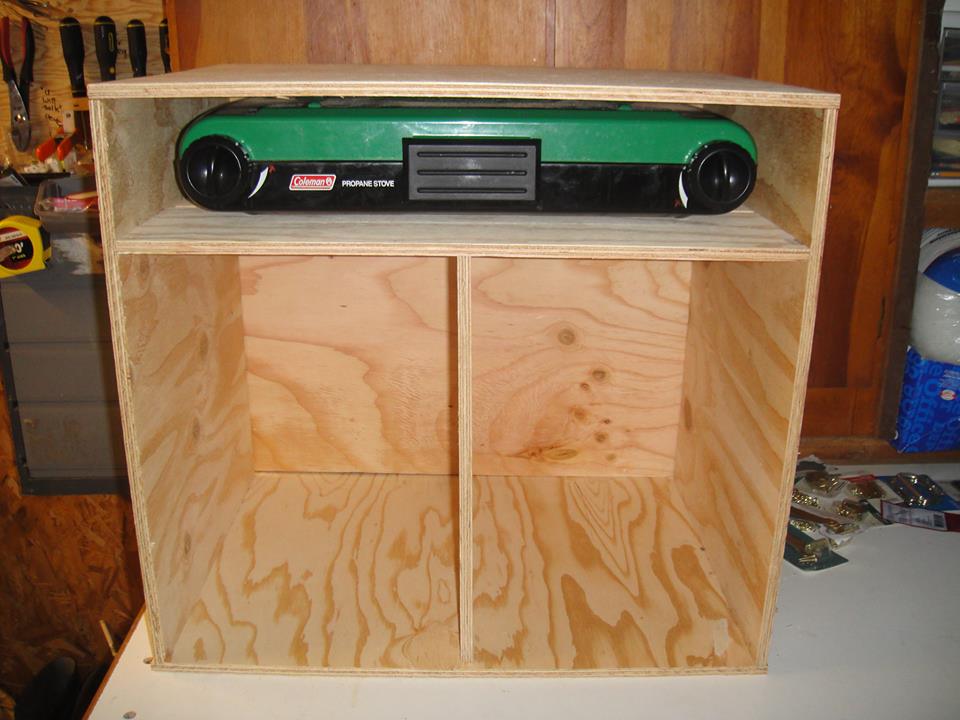
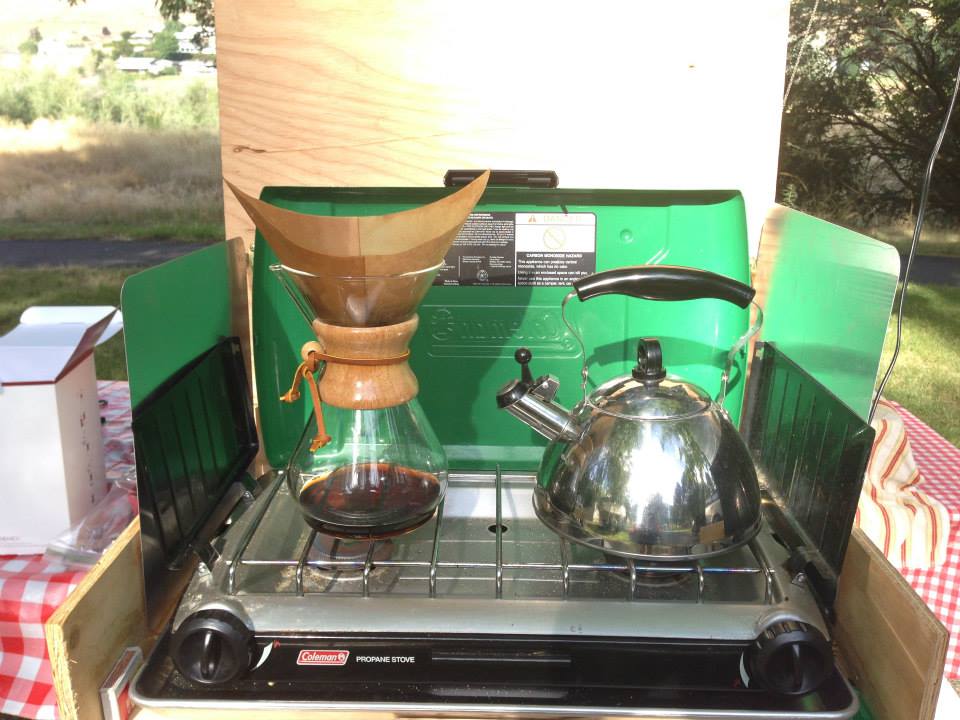
- Coleman 2 burner gas cooker.
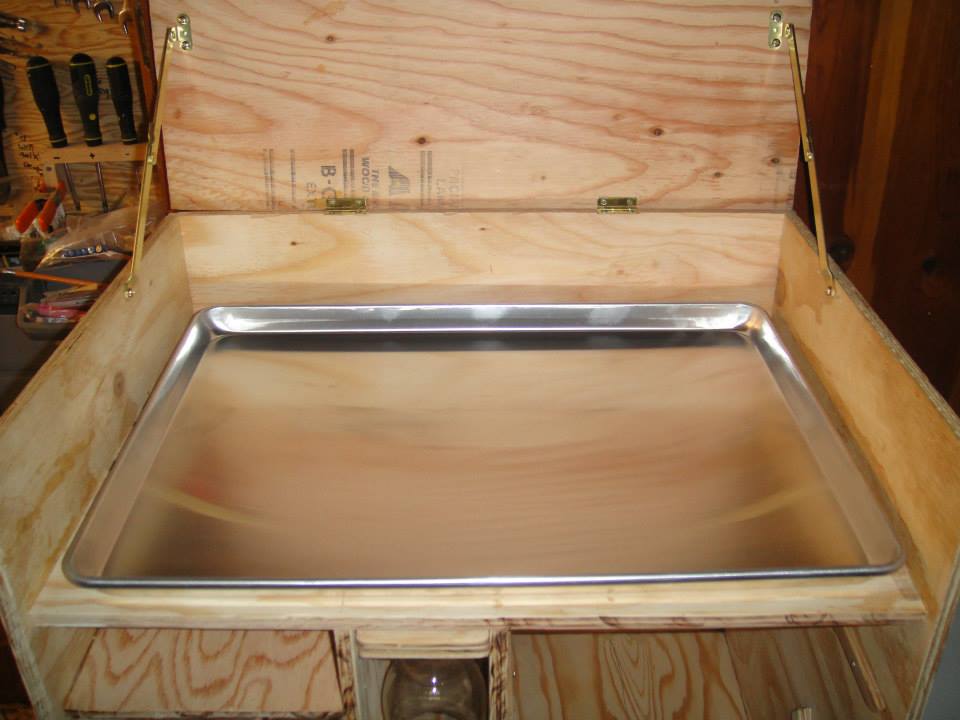
- Aluminum “splash” tray and 2 wind shields.
- Lighter.
- 1 Frying pan.
- 1 Medium & 1 small pot.
- Spatulas – metal & rubber.
- Wooden spoons.
- Small tongs.
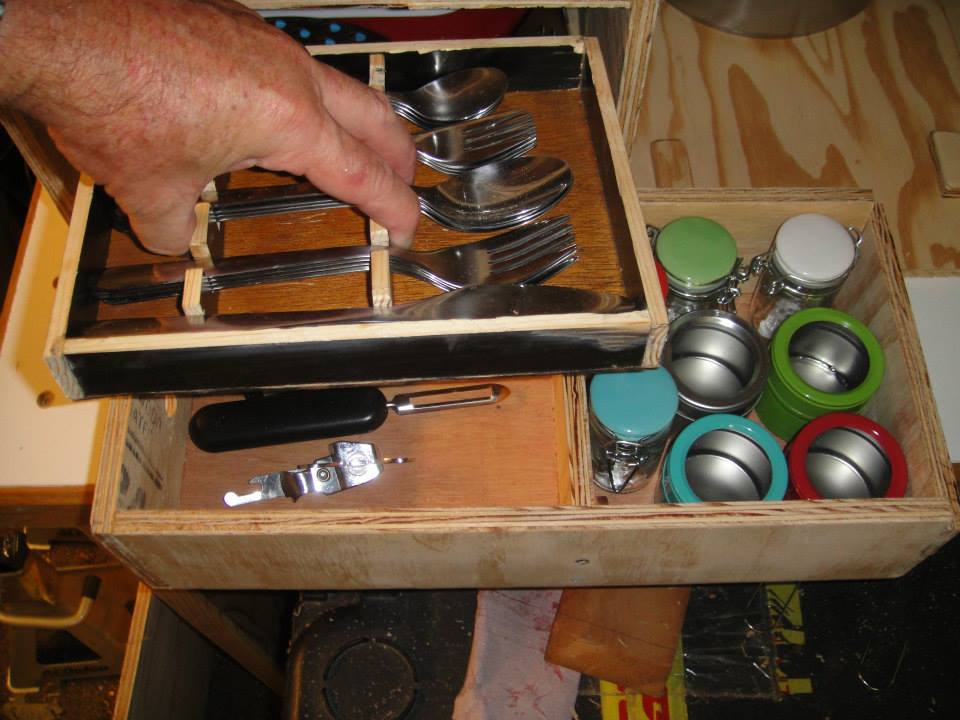
- Can opener, bottle opener & vegetable peeler.
- Cheese grater with storage container.
- Knife sharpener.
- Cutting board.
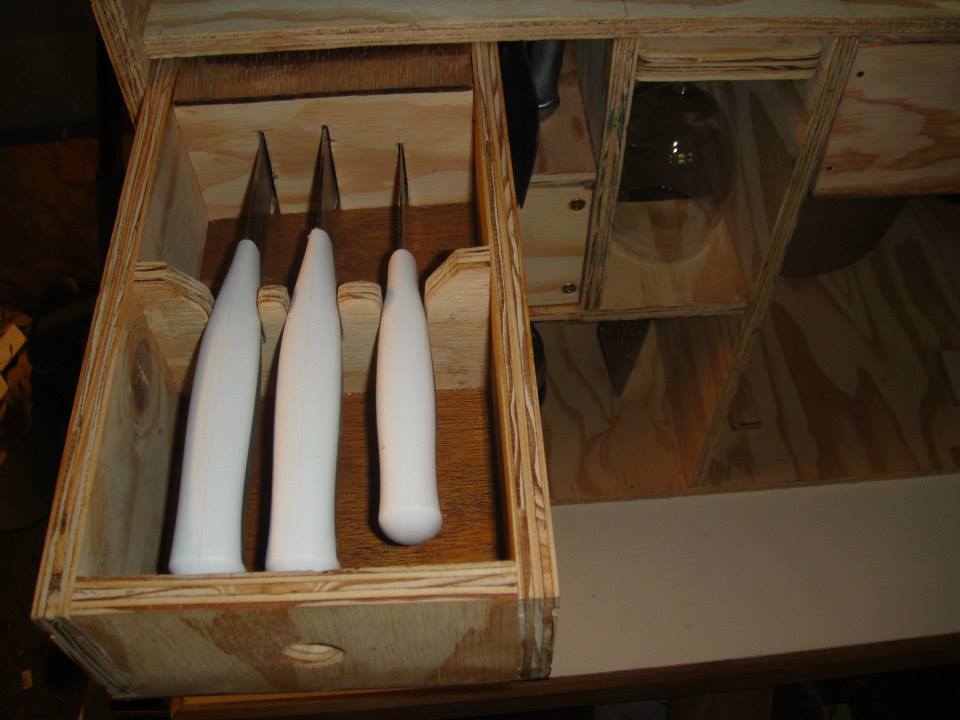
- Set of sharp knives.
- Cutlery set for 4 people.
- Crockery set for 4 people.
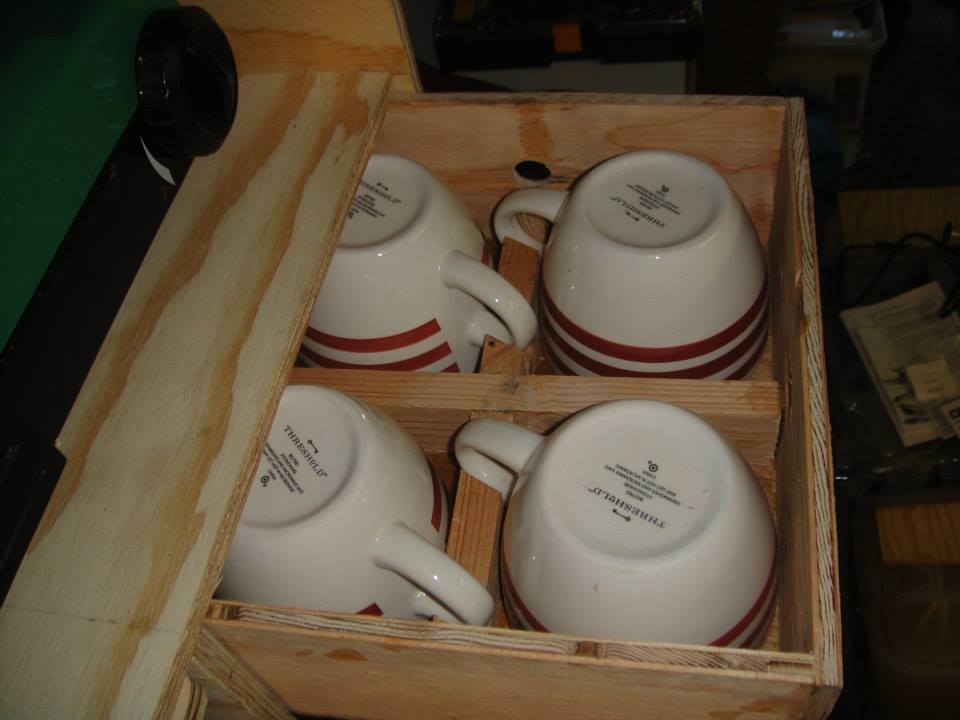
- Coffee\tea mugs x 4.
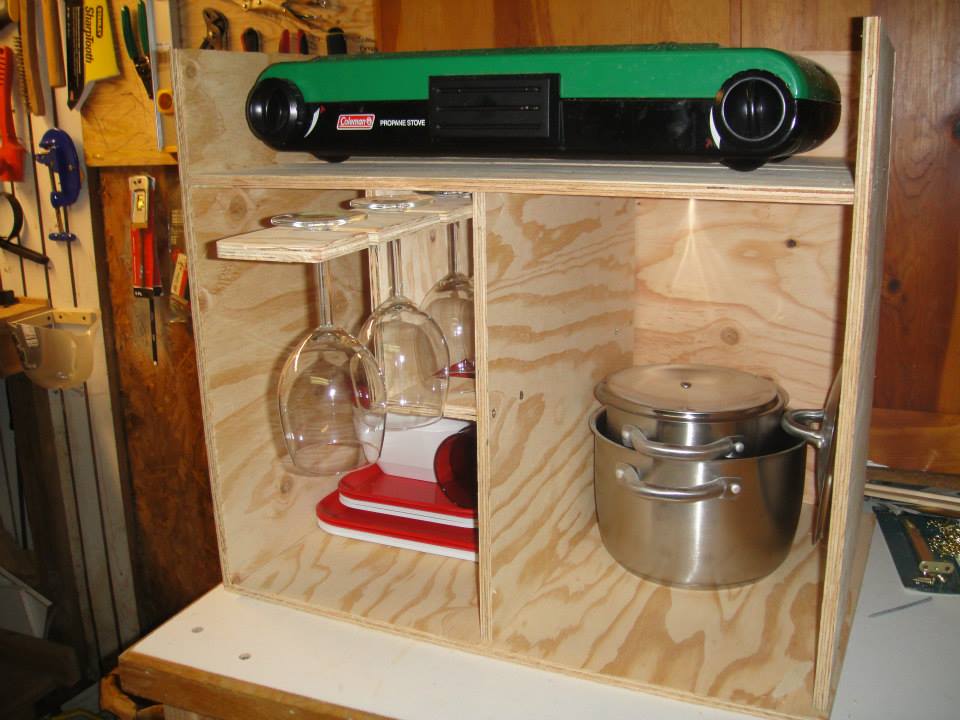
- Wine glasses x 4. (Yes, real glass)
- Plastic drinking cups x 4.
- Set of small spice containers.
To help with the following descriptions, you can scroll down to the photos below.
Construction
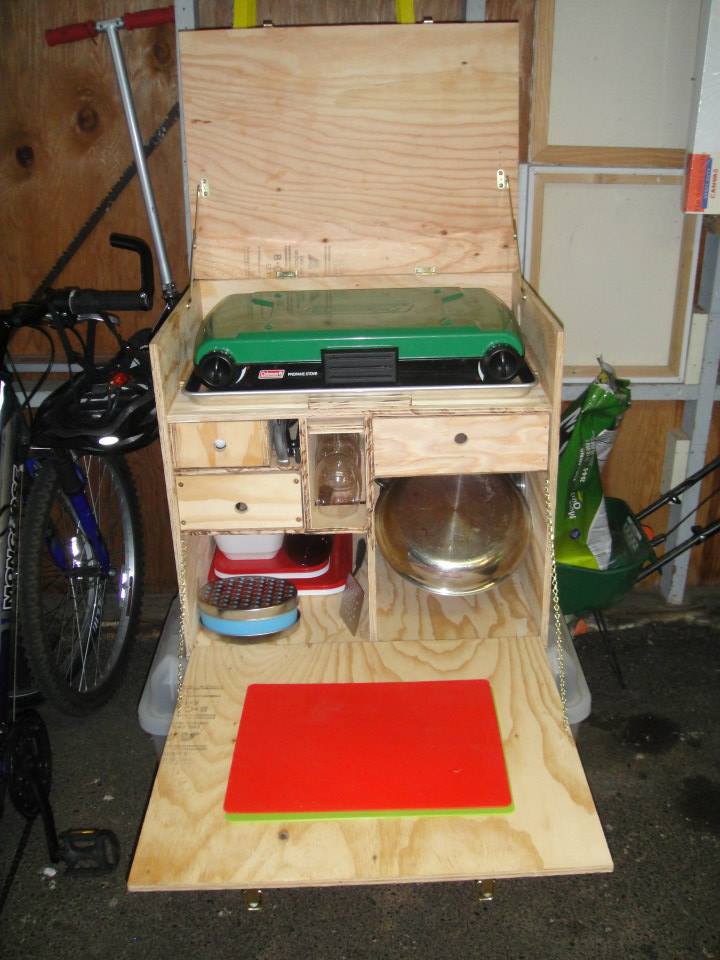
Now some comments on how it all went together. The materials – simple half inch plywood and screws. The back, floor and both ends are fixed while the top and front are hinged with small brass hinges. The stove is mounted approximately 4 inches below this top and the space below divided in half with a vertical partition. The stove floor and vertical partition below serve to anchor the ends, floor and back and holds it all together. The lid locks open with folding supports and the front is secured with chains providing a level work surface when open. Hardware to finish it off are snap clasps to fasten the lid closed and a set of folding handles.
What went where
Let’s take a look at where everything went. As already stated, the stove went at the top, I bought a cheap, aluminum tray that fits under the stove to catch any mess. When packed the cutting board sits on top of the stove along with a square of foam rubber to stop any rattling. Below the stove and at the top of the left hand partition I installed two drawers. Between the drawers and the center partition went a slide out rack to hang the wine glasses, I use small pieces of foam rubber between the glasses to keep them snug and prevent damage. There is also a space next to the wine glasses for the spatulas and tongs. The space beneath the drawers is used to store plates and bowls and the plastic cups.
At the top of the right hand partition is just one drawer for the coffee mugs. The space below the mug drawer houses the frying pan and pots. There is a fair amount of empty space in the compartments below the drawers and we used this to store various “soft” items. This includes a roll or paper towel, a couple plastic containers with tea bags, coffee and sugar, dish towels and any other items that might be looking for a home. These soft items provide packing for the hard items such as the plates, bowls and pots. If there is any free space left, I have bits of 1” thick foam rubber I cram in to snug things up.
Other bits n bobs
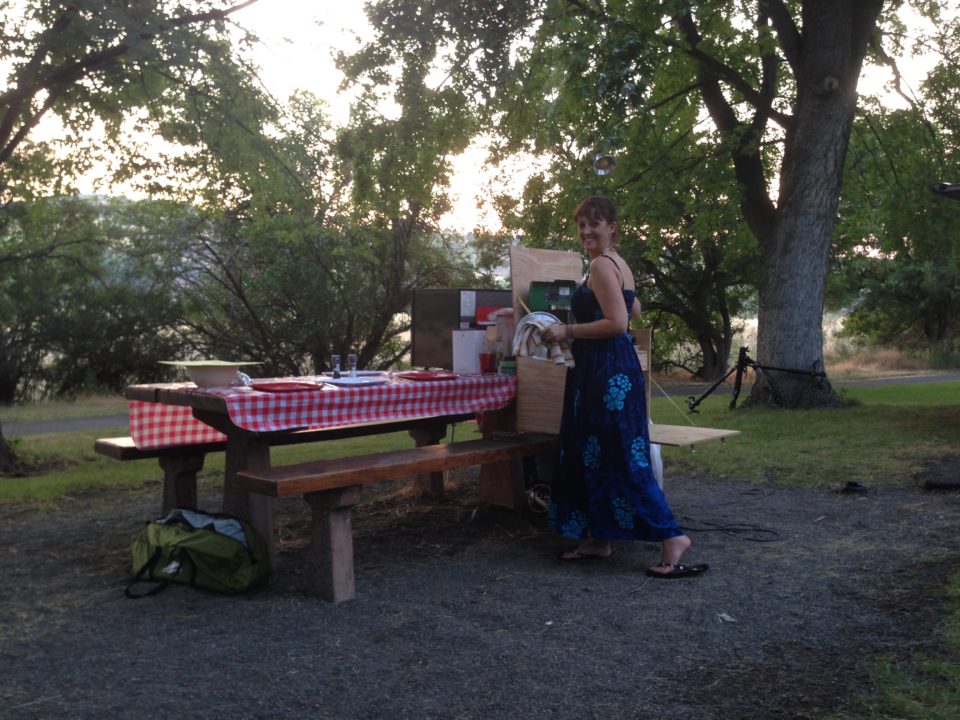
In the “miscellaneous” section, There is a 1” hole cut on the top right side of the box to take the gas hose. I have also included a couple aluminum sheets to use as wind shields, they slide under the stove in the tray for storage. While some boxes I have seen are equipped with a set of detachable legs, ours is not. We have found that the box fits quite nicely on the bench of the picnic tables found in many camp sites. In “proper” off road conditions where there are no picnic tables, the box can be placed on top of one or two other boxes or the 4×4 tailgate although this puts the stove a little high. And one last comment, we bought a dedicated set of utensils to stock the kitchen box. This means the box is always stocked and ready for a trip
The good and the bad
So how did it work? Pretty good all things considered. From our experience so far, I can list a couple important pros and cons.
Pros:
- The convenience of having everything in one place.
- Quick and easy to prepare for a trip.
- Provides a ready made work station with all the “tools” close at hand.
- Easy to clean and store when you get home.
Cons:
- Front of the box is too low to be a convenient work surface.
- When open, front of the box prevents you from getting close enough to comfortably use the stove.
- Some minor issues with how the drawers work, easy fix.
- Rather heavy.
- Carry handles too small and thin.
Wrapping it up
Summary: Over all, it is a success and has made our trips much easier in the kitchen department. The concept is sound and could be significantly improved with a few minor modifications. Easy fixes would include adjustments to the drawer construction and using more suitable carry handles. Some other ideas we have already discussed are – Make the front cover detachable and have it mounted on the side of the box when in use. This will get us up close where we need to be when using the stove and also give us a more usable work surface at a more suitable height. We will be adding a row of removable hooks along one end of the box to hang towels and other utensils. The weight issue could be addressed by using other materials, I do think the 1/2” plywood is overkill and adds a lot of weight. Aluminum would reduce the weight considerably but would complicate the construction a little. A set of detachable legs would ensure we are always set up at the correct height and don’t have to rely on other means of support.
And that’s the “Kitchen box project” Let me know what you think or share your experience with similar projects you might have carried out.